Are you looking for the simple methods to add an Interactive Map in WordPress? Well, here we have described the best methods for you. Interactive Map is an incredibly useful tool for adding to your WordPress Website.
As these are the special asset for sharing information in a graphical way. An interactive map is an image with hotspot. It permits users to discover routes, journeys, and the way by clicking on markers in the map or moving the mouse around.
Method 1: Adding an Interactive Map in WordPress by Using Google My Maps
This method is easier. In this, you don’t require to install a plugin on your WordPress site.
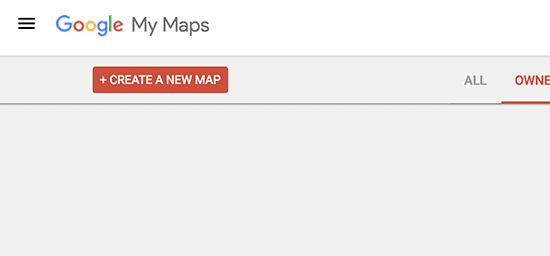
- Firstly, you can visit Google My Maps website. Click on the ‘Create a new map button’.
- Then edit the map page. Create your map by choosing a base map, layers, adding points of interest, and more.
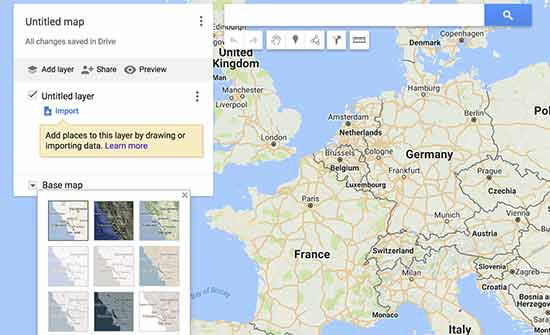
- Then using the toolbar at the top. Also, you can draw lines on the map, use rulers, add routes and select items.
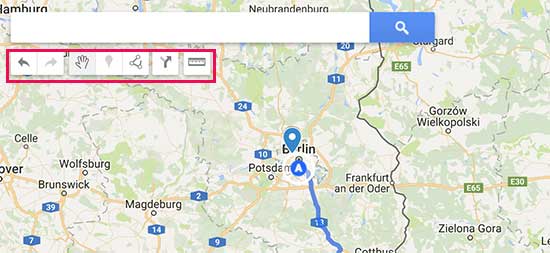
- In layers, you can be saved all your map items to the left and add, rename, edit or delete the layers. Click on any item in the layer to add a description, add photo/videos or title.
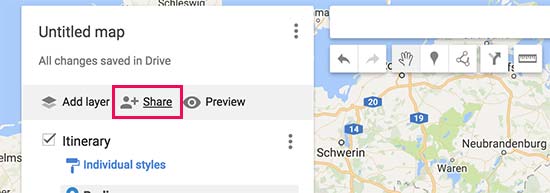
- Formerly, you are done editing your map, make it public so that you can use it on your website. Then click on the share button in the edit panel.
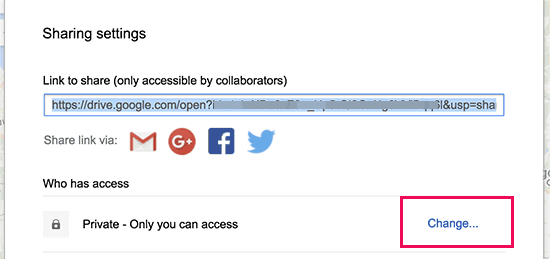
- Next click on ‘Change’ under ‘Who has access’ section. Select ‘On-Public on the web and then click on the save button.
- Then, click on ‘Done’ to close sharing center. Edit panel click on the menu icon next to map name and then select ‘Embed on my site’.
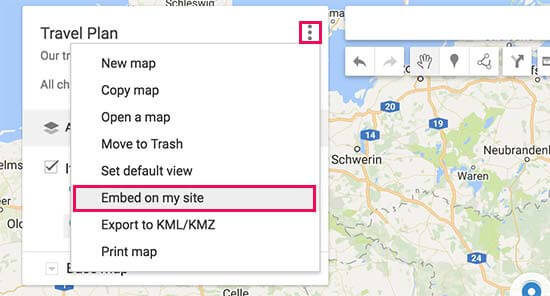
- Now, see the embed code that you require to copy.
- In post or page where you want to add your interactive map in WordPress. The post edit screen you can to switch to the text editor and paste the map embed code that you copied earlier. Now save your changes and preview.
- The articles posted by the admin of a WordPress site are called posts and pages are like posts. Pages can be managed in a hierarchical structure in WordPress.
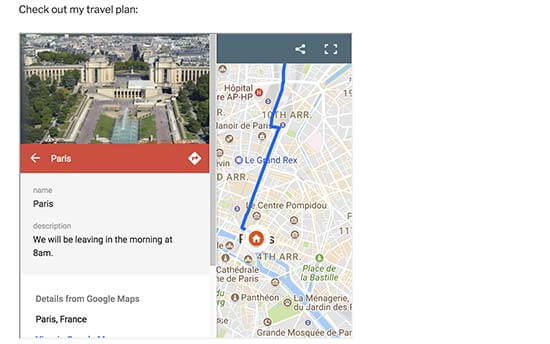
Method 2: Add an Interactive Map in WordPress With MapSVG
This method is very simple. MapSVG is a WordPress plugin. It helps you to create scalable vector maps. Since SVG images are used, every map is fully responsive.
As plugin is defined as a type of software that contains a group of functions that can be added to a WordPress website. They are used to provide additional functionality to your application.
Responsive means portability, it means – if your site has a responsive theme function then any user can view your site on the mobile devices also. However, WordPress theme developers usually use those codes that allow the whole website to resize with the screen size adjustment.
This includes all the dynamically re-sizable images, which increases readability of the site. It can handle any SVG file. Not only geographic area, but you can also utilize is to create interactive Floor Plans, Infographics and more.
Import Your Own SVG Files
As MapSVG can use an SVG image, create your own image and import them. Use the plugin to make them interactive.
Add Tooltips or Popovers to a particular region of the image. Link those areas to another URL. It is great flexibility permit you to tailor the look and functionality of an image to your exact needs.
Simple to Use and Implement
If you are depending on the image and your desired functionality, so permit the users to zoom in or out, scroll long content, display a separate text menu or display a gauge, select multiple map regions that help further explain the Map.
Setup and save your map, WordPress Shortcode is created. Easily paste that code into any WordPress page. Then go back to further edit a map later on.
Method 3: Add an Interactive Map in WordPress by Using Maps Marker Pro Plugin
If you create and add interactive map by using Google Maps, it has lacked certain features and limitation.
You want to use Bing, Open Street Maps, or other mapping services, so you can use this method.
- First of all, you can install and activate the Maps Marker Pro plugin. If you don’t know then see our guide on How to install a Plugin in WordPress. Then visit Maps Marker Pro page to create your interactive map. Click on the ‘Add New Layer’ button.
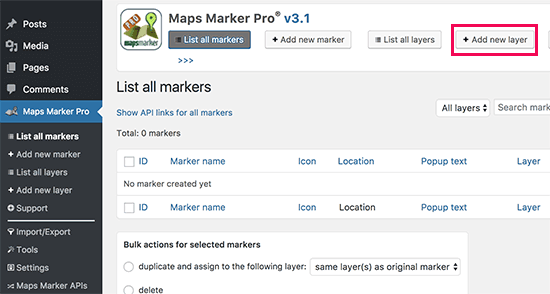
- Next, provide a name for your layer and click publish.
- Add map markers on it. Then go to Maps Marker Pro» Add New Marker page to add your first marker.
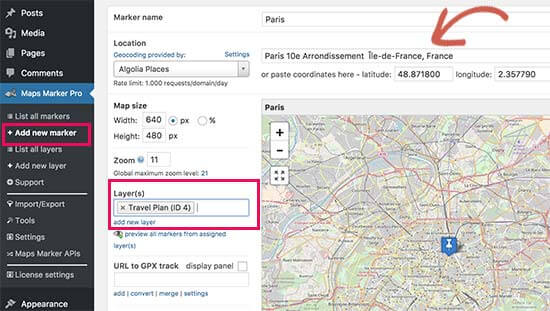
- Firstly enter a title for the marker and, search for the location and select it. Also, place your marker on the layer you created earlier.
- Click on the ‘Publish’ button to save your marker. Again, Repeat the process to add other markers to the layer.
- After done adding markers, you can edit any WordPress page. From the post edit screen, Click on ‘Add Map’ button.
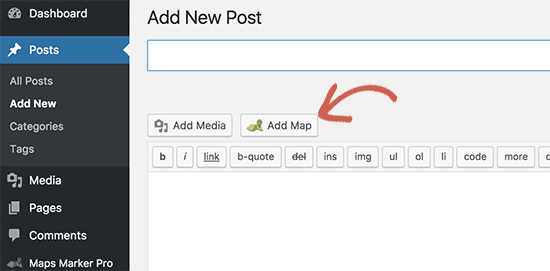
- Select the layer and click on insert map button.
- With the help of a plugin, you can add the required shortcode in your post editor area.
- As shortcodes are those special functions/tags that allows the user to quickly and easily pull related bits of mentioned functionality into their content.
- Now save or publish a post and preview it to see your interactive map.
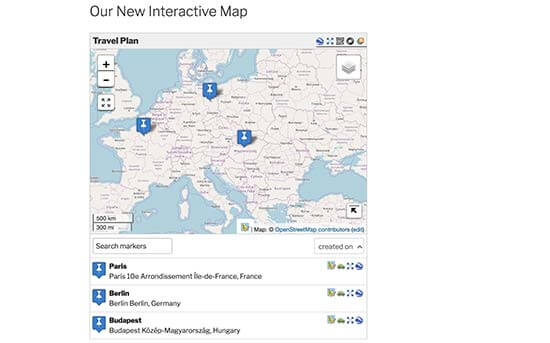
- Edit your main layer to adjust the map size and dimensions.
It is a powerful plugin with a ton of options like multi-layer maps, GPX support, export map in multiple formats, and more. Explore these options to make your maps even more interactive.
We hope that this article helped you.
You can also contact our WordPress Website Design team in case of any assistance, dial +1-888-738-0846(Toll-Free). We will be glad to help you.
