Recently a lot of users asked to tend to ask, is it possible to add Attachment File Type Icons in WordPress? Yes, it is possible and very easy.
By default, WordPress permits you to upload images, video, audio and other documents. Also, you can allow additional file types to be uploaded in WordPress. However, when you upload a file through the Media Uploader and add it to a page or post, WordPress will try to embed the file if it is in an image, video, audio, or in a supported file format.
Where In WordPress, pages are like posts. Pages can be managed in a hierarchical structure in WordPress and the articles posted by the admin of a WordPress site are called posts.
For all other files, it will just add a file name as a plain text. And link it to the download or attachment page.
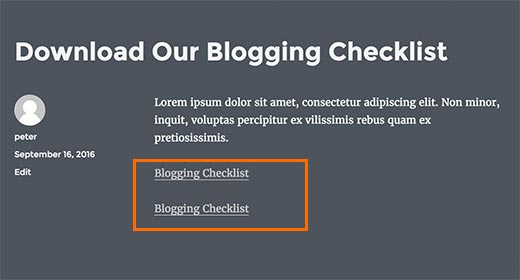
In above screenshot, we have inserted a PDF and a docs file. However, it is difficult for the user to guess which file they are downloading.
Although, if you upload different file types on a regular basis, you may want to display an icon next to the link. So your users can easily find the file type they are looking for.
Here, in this guide, we are going to illustrate to you two methods on how to add attachments file type icons in WordPress.
How to add attachment file type icons in WordPress
Method 1: Add Attachment File Icons in WordPress by Using Plugin
First, you have to install the Mime Link Type Icon plugin and then activate it. To know more, see our guide on how to install a WordPress plugin.
After activation, you need to go to Settings>>MimeType icons page to configure plugin settings. Where plugin is defined as a type of software that contains a group of functions that can be added to a WordPress website. They are used to provide additional functionality to your application.
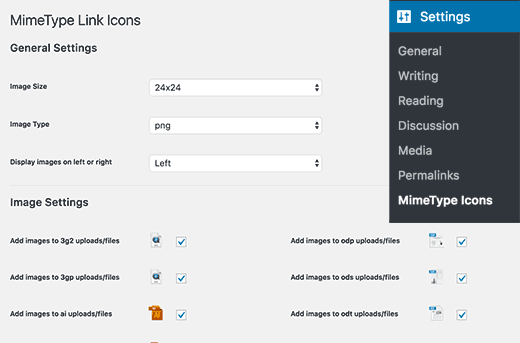
The plugin allows you to choose the icon size, you can also choose between PNG and GIF icons. Where PNG images are usually needed in those places where you need a transparent image background.
After this, you have to select the icon alignment and which file types icon will display the icon.
However, under advanced options, you can enable CSS classes to hide icons. Where CSS class is stands for Cascading Style Sheet. These are the documents which contain the styling rules that can be applied to HTML or XML, (along with some structural formats).
Furthermore, several style rules can point to one HTML element. File download links wrapped in these CSS sections will not show the icon.

Below you will find the option of showing the file size that is next to the download link. It has been turned off by default because this resource can be intensive.
However, if you want, you can enable it and also enable the option to ‘Cache retrieved file sizes’. where Cache shows functional links and pages completely as the real version of your website.
Don’t forget to click the Save Changes button to save your settings.
Now you can edit a page or post and add a file download link by using the media uploader. As media uploader is used to upload several media type files to the server.
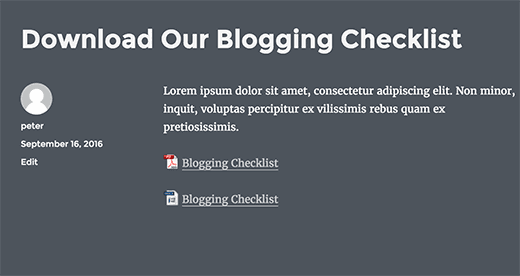
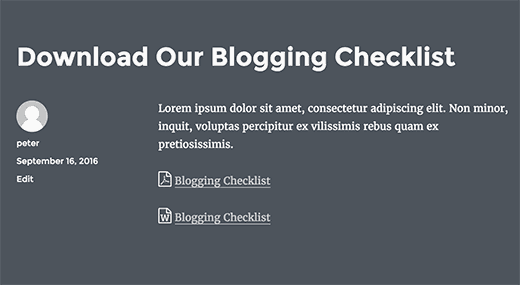
Preview your post and you’ll see a file icon that is next to the download link.
Method 2: Using Icon Fonts for Attachment Files in WordPress
In this method, we will use the icon font to show an icon next to the attachment file link.
First, you have to install the Better Font Awesome plugin and then activate it.
After activation, you can edit a page or post where you want to add an attachment link.
Thus, you will see a new ‘insert icon’ button at the top of the post editor. Where Editor may refer to a pre-defined user role. As an Editor, users have the authority to edit, write, publish, and delete posts. This includes posts which are written by other users. By clicking on it will display a popup, where you can search and choose the icon you want to add.
Post Editors have authority only just adding & removing content, manage their profile, categories, tags, custom taxonomies, username and password, and even upload files.
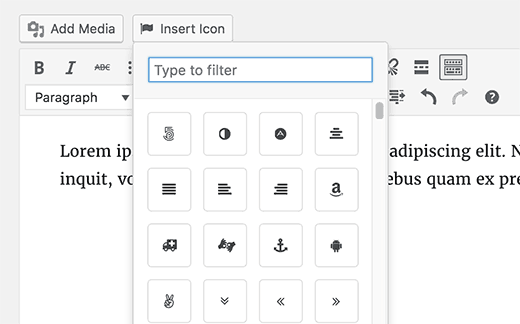
The Font Awesome comes with many icons and has icons for the most used file types. Click the icon that you want to add and the plugin will automatically add the required Shortcode to the post editor. Where shortcodes are those special functions/tags that allows the user to quickly and easily pull related bits of mentioned functionality into their content.
You can now upload your file and insert it into the post by using the Media Uploader.
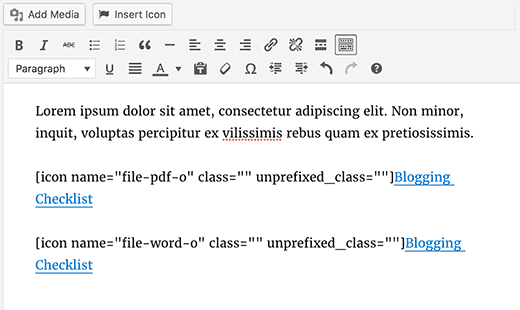
Also, you can add your own custom CSS to a file icon by adding your own CSS class to a shortcode like this:
| [icon name=”file-pdf-o” class=”” unprefixed_class=”pdf-icon”] |
Now you can use the .pdf-icon class to change the icon size, color and change the style according to your needs.
Conclusion
Here, We have discussed 2 Easy Methods to Add Attachment File Type Icons in WordPress. As Icon fonts contain pictograms or symbols instead of letters and numbers. There are free and open-source icon fonts available including hundreds of icons. As plugin lets you easily add an icon font to any WordPress theme without modifying any code. Just read the above methods carefully and add your attachment file type icons.
We hope this post helped you with adding this. If you have any query or suggestion to add it, let me know in the comments box below. Also, share this post with your peers!
You can contact to our WordPress Support team if you need any help related to WordPress, dial +1-888-738-0846 (Toll-Free). We will be pleased to help and support you in case of any issues related to WordPress.
That’s all, thanks!
