
Here, In today’s post, we are going to describe you How to Accept Internet Banking Payments on WooCommerce? We will be walking through some steps on how we can install Xfers WooCommerce plugin to enable your online shop to accept internet banking payments. As, plugin is defined as a type of software that contains a group of functions that can be added to a WordPress website. They are used to provide additional functionality to your application.
Now, the question is that What is Xfers? Xfers enable online merchants to receive payments from their customers through Internet Banking transfer in an automated and secure manner.
Xfers plugin supports only shipping, discount amount and WooCommerce tax. If you want to use additional fields for fees, you should either place it in one of our supported fields or include it in the price of the product.
Ensure that your website is built on WordPress and that you have installed WooCommerce. As, WordPress is one of the leading websites all over the world for serious bloggers. It is a free and open-source content management system (CMS) based on PHP and MySQL. Here, CMS is a system which allows users to easily create, edit, organize and publishing content.
WordPress uses MySQL, as an open source database management system to store and retrieve all of the website’s information, everywhere from the content of the posts and pages to the comments, usernames, and passwords of your website. Here, the articles posted by the admin of a WordPress site are called posts and pages are like posts. Pages can be managed in a hierarchical structure in WordPress.
What is MySQL
MySQL in WordPress is a central component in the LAMP stack of open source web application software which is used to create websites where LAMP stands for Linux, Apache, MySQL, and PHP.
You have also another option of getting help by talking to our WooCommerce Setup Experts as they will guide you promptly to fix all kind of issues. Dial +1-888-738-0846 (Toll-Free).
Some steps to know the methods to accept internet banking payments on WooCommerce
Step 1: Set up your free Xfers account
- Firstly sign up for a merchant account on Xfers.
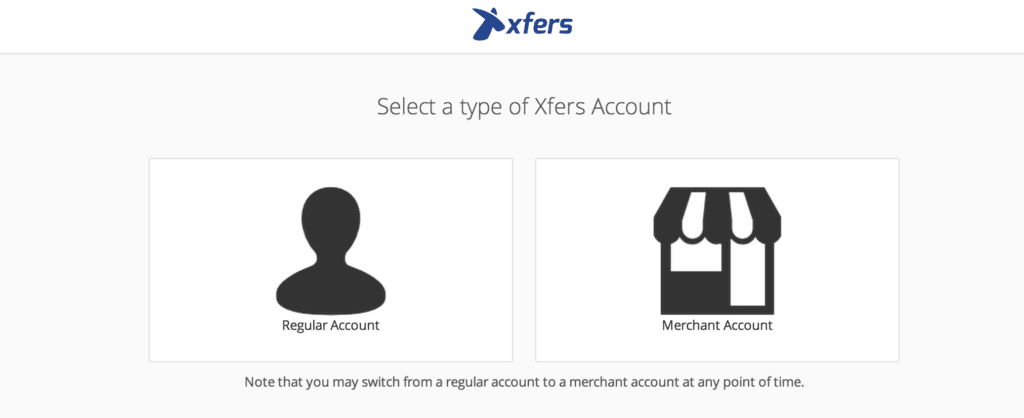
- Then choose Merchant Account.
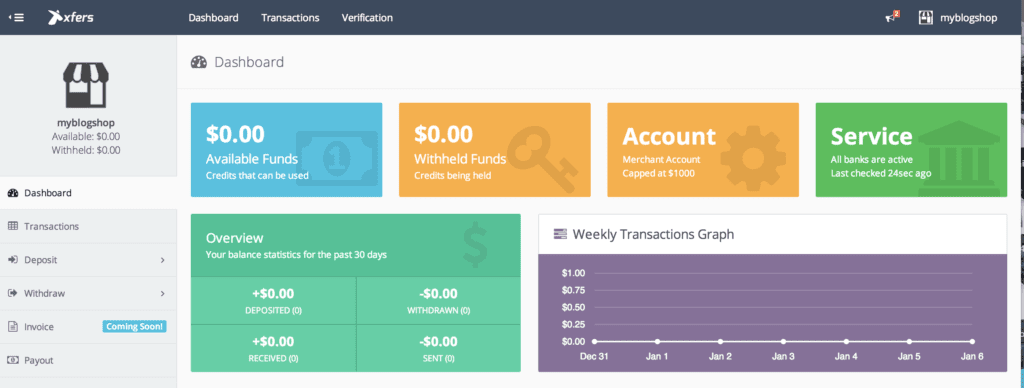
- You have signed up successfully once, you will be directed to your dashboard page where you can view all your incoming or outgoing transactions.
Step 2: Retrieve your API and Secret key from your Xfers Merchant account
- In dashboard from the menu on the left, go to Settings>>Account particulars and copy your API key and API Secret at the bottom. Where, an API key is like a password.
Step 3: Download and Install Xfers WooCommerce Plugin on WordPress
- The Xfers WooCommerce plugin is free and easy to use. To download this plugin follow the instruction as mentioned below.
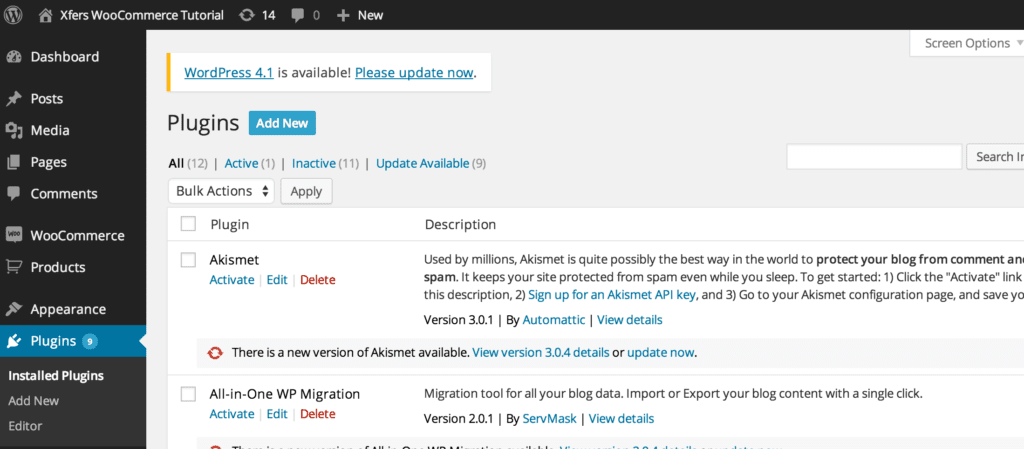
- Go to your WordPress site, on the left menu, choose the plugins>>Add New>>Upload plugin to upload the Xfers plugin.

- After that, choose the Xfers plugin zip file which you downloaded and click “Install Now”.

- Once Xfers plugin is installed successfully, you will see this page. And then click the “Activate Plugin”.

Step 4: Set Xfers as your method of accepting payments on WooCommerce
- In this step, from the menu that is on the left of your WordPress admin page, Choose WooCommerce>>Settings.
- Then, click on Checkout tab at the top and choose Xfers as a payment checkout option for your site.
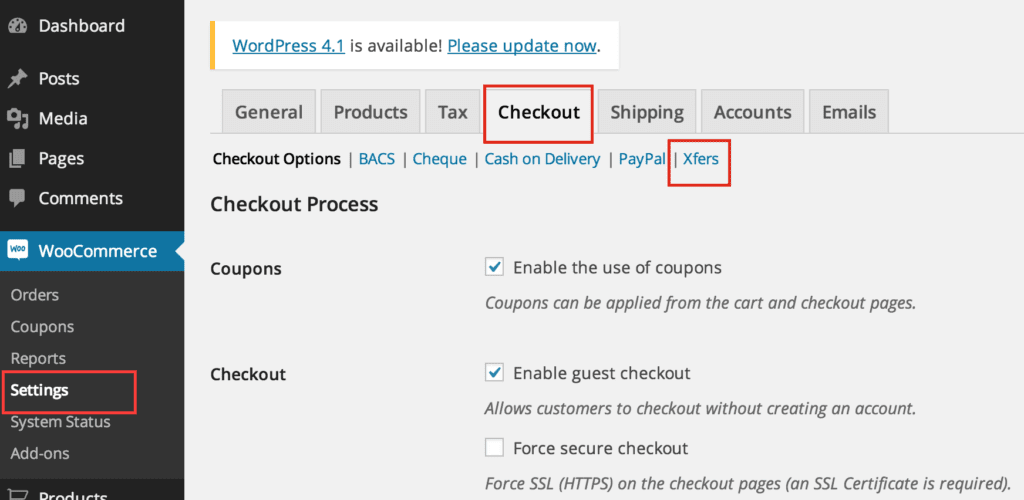
- Scroll to the bottom of the page and click on Settings for Xfers.
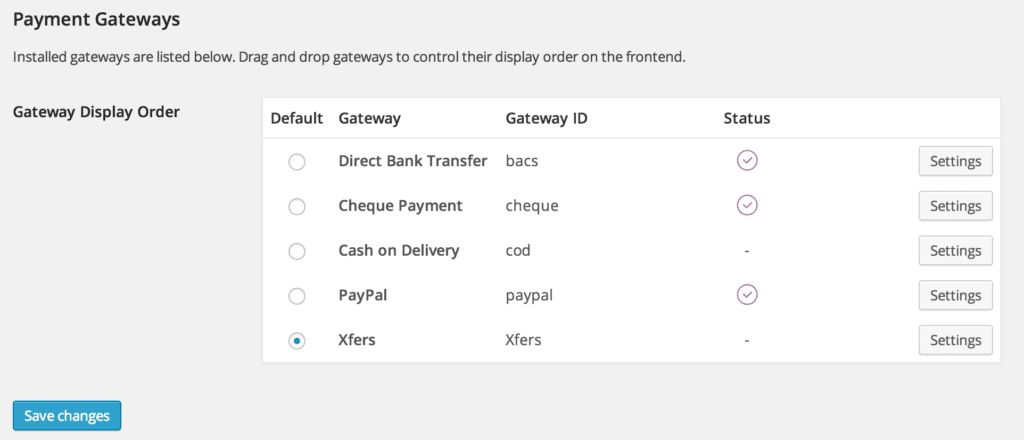
- After that, fill the information in your Merchant account particulars and then click the save button.
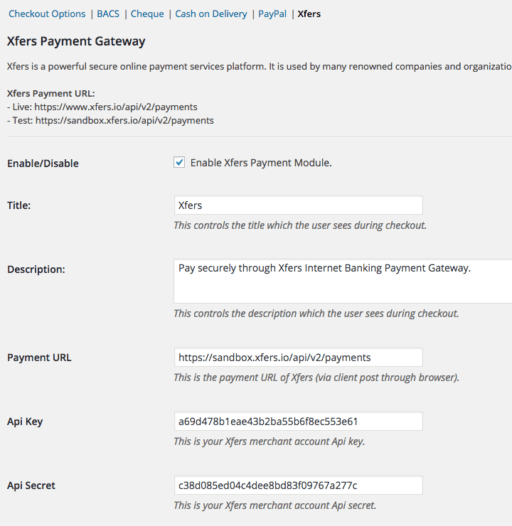
- Use the fake Merchant Account to test the checkout process.
Note: If you want to test the payment plugin before setting it live, you can do so by creating a sandbox Merchant Account and after that in the payment URL box, use https://sandbox.xfers.io/api/v2/payments in place of other URL.
For API key secret, you should also use the sandbox account API Key and Secret.
Step 5: Testing the Checkout process
- Now, we have configured the Xfers plugin, let’s try checking out with Xfers in our online shop.
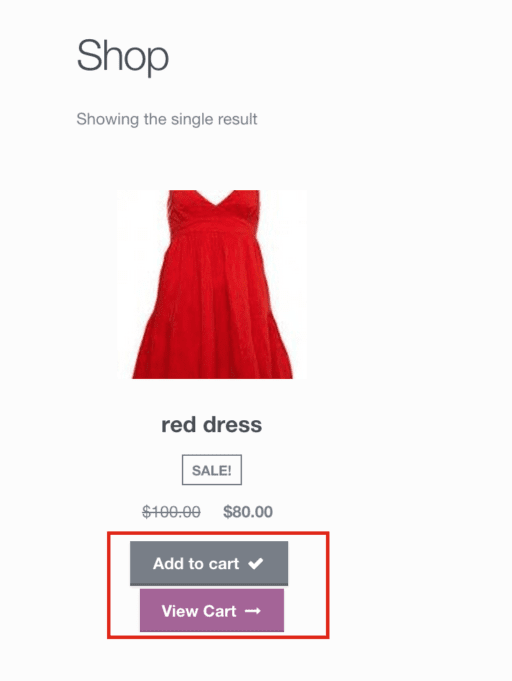
- Let’s add an item to my cart and after that click view cart.
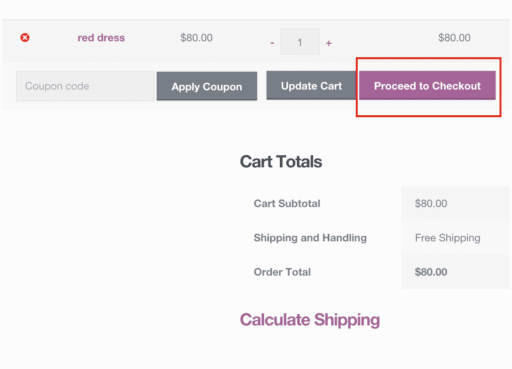
- Then, continue to checkout.
- Lastly, chose the Xfers as the checkout option.
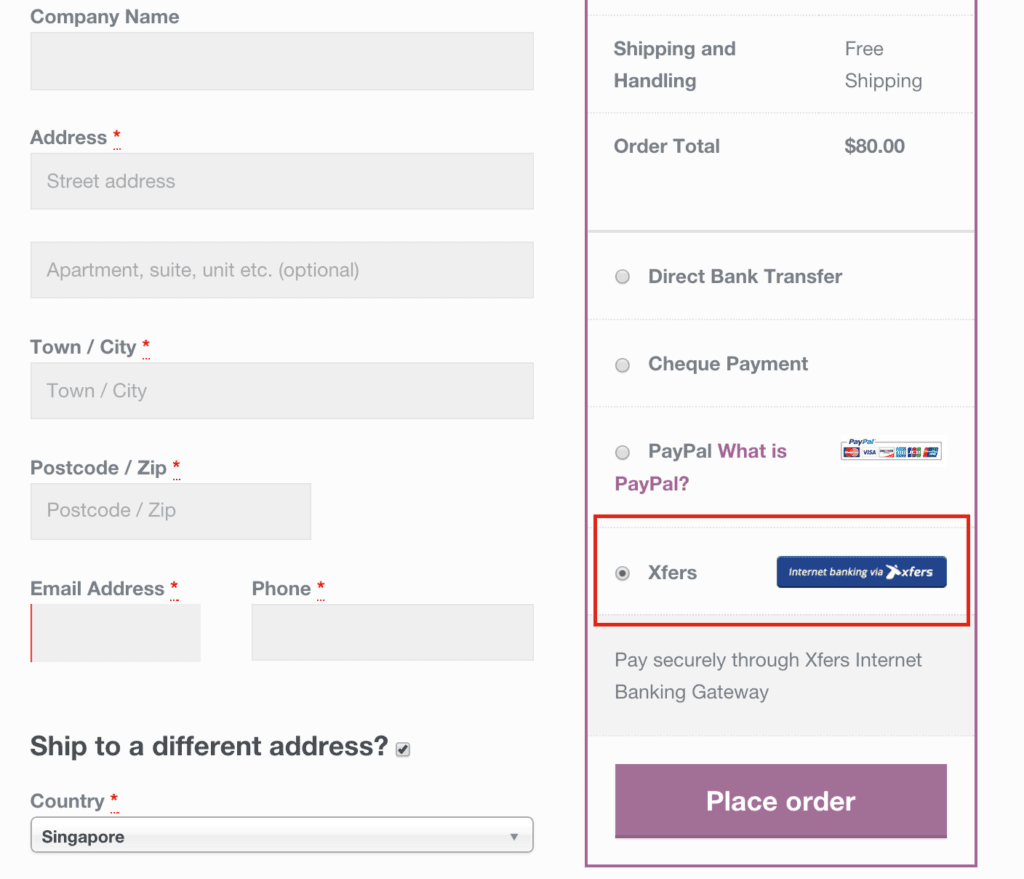
- Now, we can accept problem-free internet banking payments through Xfers.
CONCLUSION
Here, in this blog, we have discussed the Easiest Way to Accept Internet Banking Payments on WooCommerce?
Often we concluded Some steps to know the methods of accepting the internet payments. And, this leads to the end of the blog.
We hope this blog helped you. If you have any query, do not forget to use the comment section below. Also, share the blog with your friends.
You can contact our WordPress Technical Support Team Dial +1-888-738-0846 (Toll-Free). The door to our WordPress customer service is always open for you. We will be pleased to help you and solve the issue related to WordPress.

