The localhost in WordPress is the default name which describes local computer’s address also called as the loopback address. where the loopback these addresses enable the Server and Client processes on a single system to communicate with each other. For example, by typing: ping localhost, it pings the local IP address of 127.0.0.1 (the loopback address). Whenever setting up a web server or software on a web server, this above loopback address is used to point/define the software to the local machine. It is very important to understand that there are two ways to use WordPress, one with the purchased domain and the other with localhost. As localhost provides a huge advantage for a user to create a WordPress website which can be hosted in local server. The localhost in WordPress helps the user to upskill themselves and experiment with the WordPress without any constraint.
In the field of computer networking, localhost is a host which refers to “this computer” or by more accuracy “the computer I’m working on”. IT types, network administrators and programmers, also use the term “home” (home computer). For example, if you type localhost in your web browser, so the browser will connect to the computer that you are using currently.
A keyword in this above definition is “network,” it is because the term “localhost’ comes into play only when someone is at their computer and connected to a network and by using it for testing programs or for testing the virtual connection between two computers.
Generally, the localhost is used for testing and development process. When any developer install any software stack such as WAMP, LAMP, and MAMP on their personal computer so they type “localhost” in the web browser for pulling up their WordPress website.
However, localhost is also used to connect to your MySQL database. As MySQL stores the data of the WordPress in its database. During the WordPress installation process, you are asked for a hostname that is usually the localhost. This is because the WordPress and MySQL are basically installed on the same server. By telling WordPress that your MySQL server is “localhost” means saying to WordPress to look for the database on the same server.
Advantage of localhost
- It’s always better to have a local server for development.
- You don’t need to express your half done work or undergoing development to the outside world.
- Can experiment your website as much time you want with free of cost.
- Fewer chances of losing your data, as you can have a personal backup.
- You are not blocked by any firewalls.
- You can test your website while developing itself and much more.
How To Install WordPress Locally (Your “Localhost”)
There are a number of WordPress specific tools by which you can create a local WordPress development environment. Some of them are:
- MAMP: It is a cross-platform which uses both Apache and NGINX.
- WAMP: It is a window-specific Apache web development.
- XAMPP: It is a general local development using the Apache web server.
To create a local development – Very first, install and configure with one of the tools. Thereafter, install the WordPress on it like you would at your host. Now by typing ”localhost” in your web browser, you will be able to access your local WordPress site. 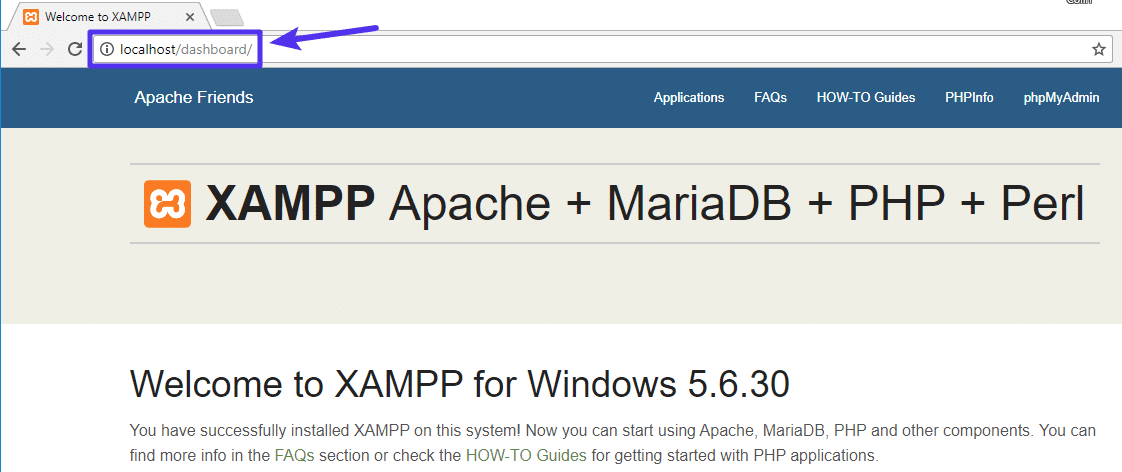
Installing WordPress in Localhost
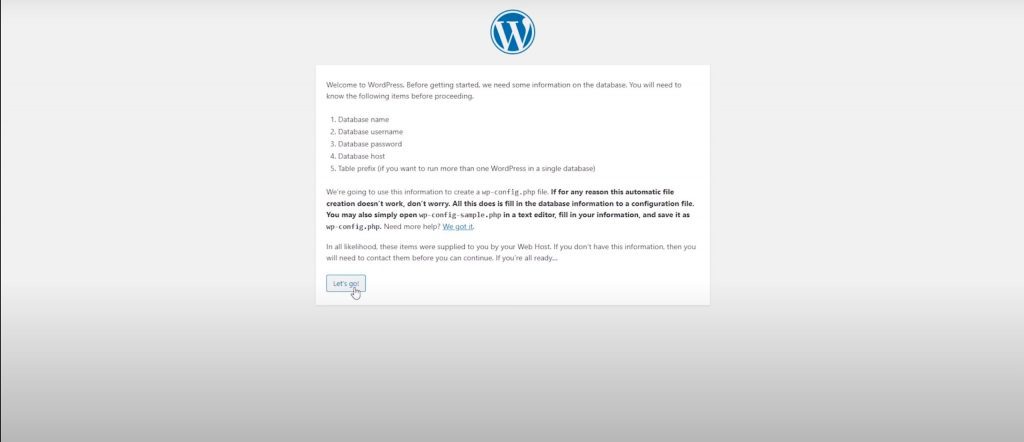
You have to install the WordPress installation package which can be found here from the official WordPress.org, also please download with your correct PC configuration. After the download, install the WordPress file. After the installation, the localhost in WordPress launches the language setup wizard. WordPress supports many languages as WordPress is the most popular and widely used content management system (CMS) which allows users to easily create, edit, organize and publishing content.

Localhost in wordpress select language
Database Configuration with WordPress in Localhost
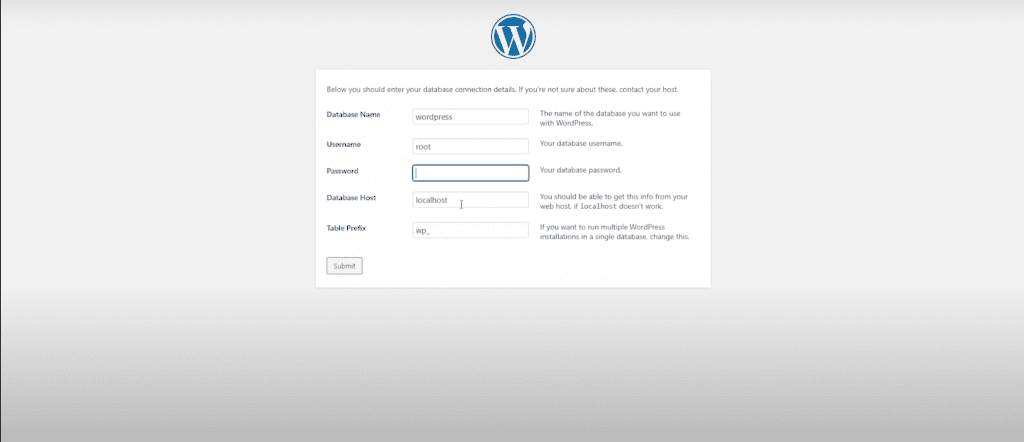
After selecting the preferred language, you have to provide the information on the database which is used in XAMPP server. The details including database name, database username, database password and database host can be found while creating the database in MYSQL server.
Creating Username and Password for localhost
Please fetch the details and add it to the WordPress configuration page. Create the Username and Password as this username and password is for the database, Click submit once you are done. Please ensure to remember these credentials, where these details can be uploaded to other servers.
Run the Installation
All right, you have made it through this part of the installation where the WordPress can now communicate with your database. Click the button to run the installation.

Username and Password config with WordPress in Localhost
Now, a welcome page appears where WordPress will ask you to create the username and password with the site title as this information is required to access the WordPress site as an Admin. This data is to be kept confidential as once you move towards the domain hosting service after purchasing the domain from a domain hosting sites, you have to use this data to access your domain page if you are trying to migrate the WordPress from localhost to domain server.
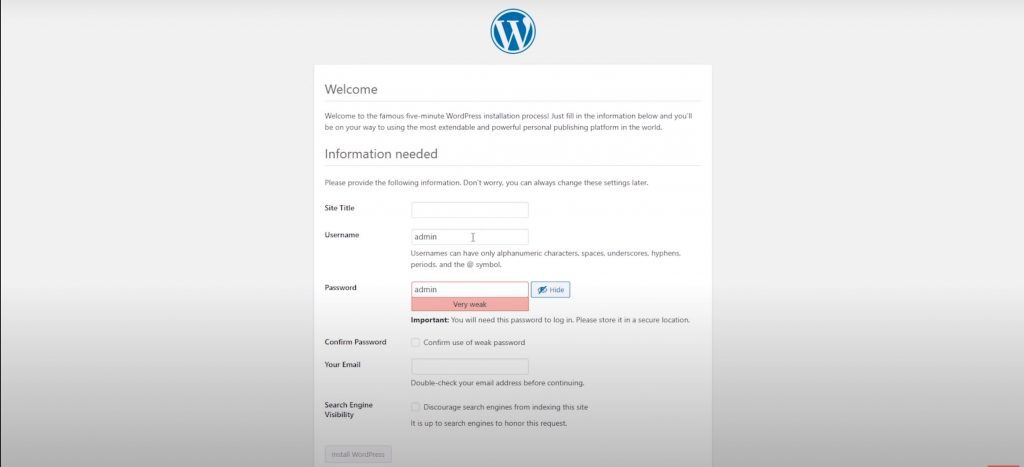
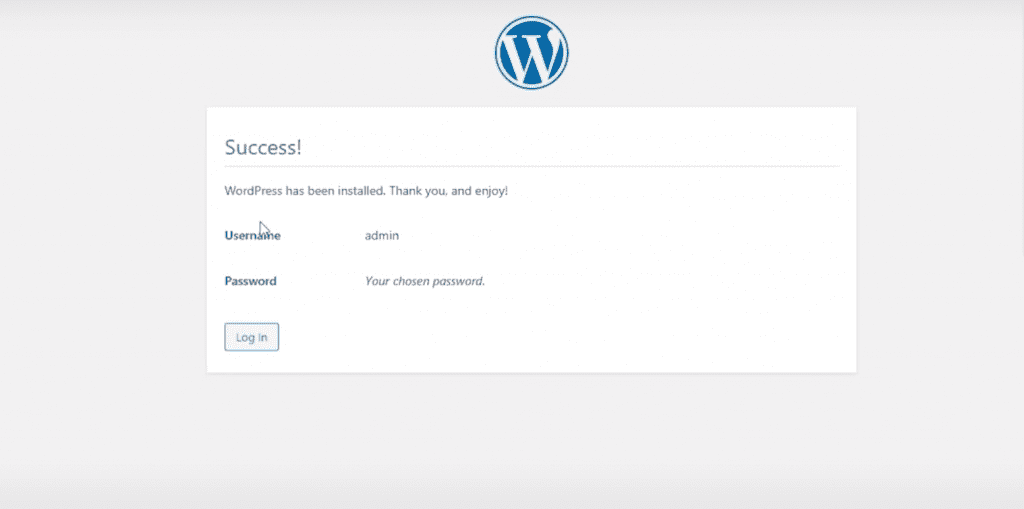
Login to WordPress in localhost
You have successfully installed the WordPress and now use the password to login.
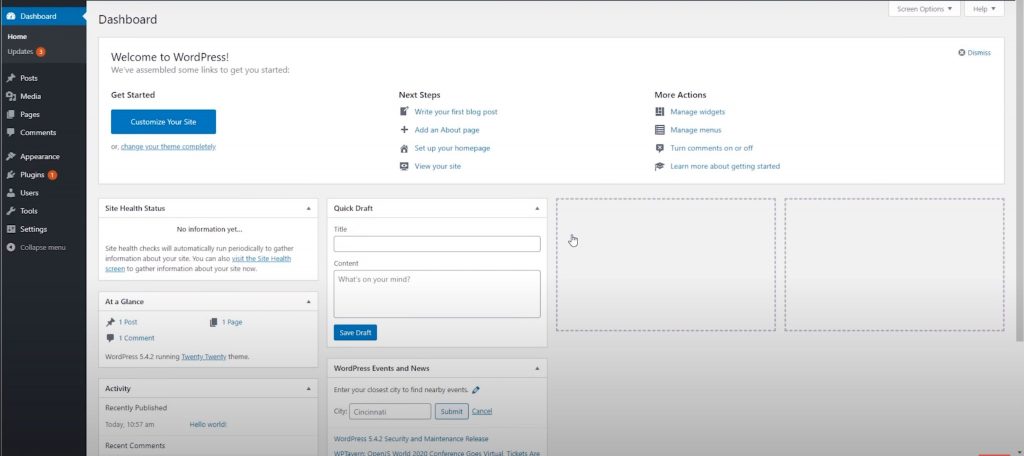
Dashboard
Now, after logging in you can use the WordPress CMS to create your websites. The dashboard provides all the configuration you need to generate the WordPress site.
Conclusion
This article provides the process of installing and configuring the localhost in WordPress. You can follow these step by step process to create the localhost in WordPress. Also to migrate from localhost to a domain hosting server follow our article here. To migrate the WordPress site to a new host click here. Learn how to design a WordPress site here.
You can now easily create a WordPress site using the localhost server with not worrying about the migration as WordPress contains All-in-One WP Migration plugin which seamlessly transfers the entire WordPress site to another server without any loss of data.
