A plugin is defined as a type of software that contains a group of functions that can be added to a WordPress website. They are used to provide additional functionality to your application. We have shown the two ways to install plugin in WordPress which is free and paid.
Read More: Top 8 WordPress Plugin for SEO
HOW TO INSTALL PLUGIN THAT’S FREE
How to install plugin in WordPress that’s free works differently than installing a premium plugin. We will tell you both and first Starting with free plugins:
- First of all go to the admin panel – http://your-domain.com/wp-admin/ and click on “Plugins” in the sidebar menu:
- As sidebar is a theme feature, which is basically a vertical column provided by a theme for displaying information other than the main content of the web page.
- Here, theme is a group of stylesheets (stylesheet refers to a CSS file in a theme) and templates that are used to describe the appearance and display of a WordPress site. Also, Templates are those files which control how your WordPress site will be displayed on the Web.
- As, CSS is known as Cascading Style Sheet which are the documents containing the styling rules that can be applied to HTML or XML. Where the word cascading expresses the process of filtering down from general rules until the most specific rule is encountered.
- Then, click on the “Add New” button at the top

- You’ll see next is a page showing you a short list of recommended plugins and a search field on the right – this is the one we’re going to use. Just Input the name of the plugin that you want to install in that search field.
- Here, pages are like posts. Pages can be managed in a hierarchical structure in WordPress and the articles posted by the admin of a WordPress site are called posts.
- Select the plugin and click the “Install Now” button. When you will do this WordPress is going to fetch the plugin and have it installed on my site. It works much like installing a new app from the App Store.
- When the installation is complete, you’ll see this:
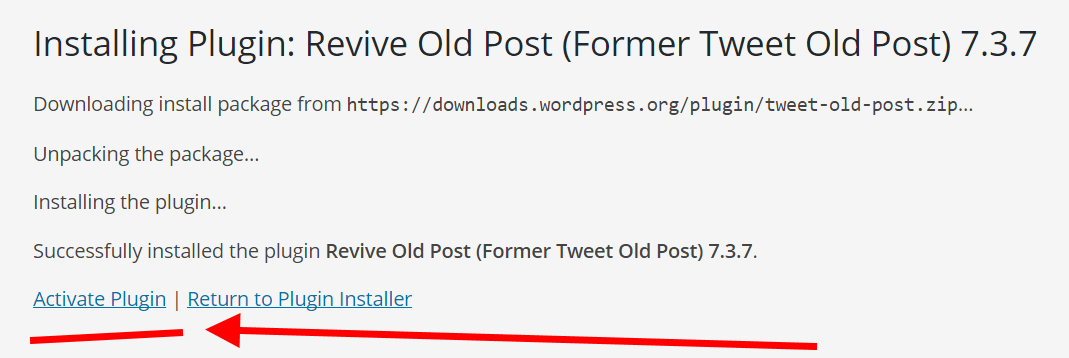
- click the “Activate Plugin” link that has just appeared. The plugin has been activated, and WordPress will let you know about this fact over a small note at the top of the page:
HOW TO INSTALL A PREMIUM / PAID WORDPRESS PLUGIN
The whole process of how to install a WordPress plugin that’s premium different. premium plugins are not available in the official plugin directory – the one you can access using the search option in your wp-admin panel.
- Firstly obtain the plugin itself. This step you need to handle on your own. It involves going to a marketplace or a plugin store, and buying a copy of the plugin from there.
- As a result of your purchase you should have the installable plugin file saved as a ZIP archive. Like so:
- Once you have your ZIP file, go back to your WordPress wp-admin panel, click on “Plugins” in the sidebar menu, and then on the “Add New” button:
- Here, admin panel is also known as the administration area in WordPress website where only an authenticated user can make changes.
- With the admin panel, it allows you to create and manage posts, pages, menus, media, change styling in the form of themes, add functionality in the form of plugins and much more.
- Next, click on the “Upload Plugin” button visible at the top:

- On the next screen, you will be able to upload your plugin’s ZIP file straight to your WordPress. Select the ZIP from your desktop and confirm the upload by clicking on “Install Now.”
- When WordPress finishes doing its magic, you’ll only need to activate the plugin. After doing so, the plugin is online and you can start using it.
1. How to Install WordPress Plugins via Dashboard
Installing a WordPress plugin from within your dashboard is one of the most effortless methods to get a plugin up and operating quickly. The first thing you accomplish is beneath the plugins department of your WordPress dashboard connect on “Add New.” You can then explore the plugin you like to install. In our example, we organise Yoast SEO. You can also scan the featured, popular, and suggested plugins. Then click on “Install Now.”
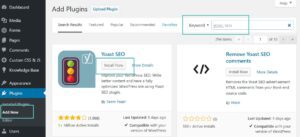
Click on ”Activate”
And that is it! Your plugin is now established, started, and prepared to use. Most plugins, mainly the larger ones will have an opportunities menu that might occur on the left-hand side of your WordPress dashboard. For example, with the Yoast SEO plugin, we now have an “SEO” menu in which we can directly dig into the stages of the plugin.
2. How to Install WordPress Plugins Through FTP
The 2nd way to install WordPress plugins is to do it manually via SFTP (secured FTP). In this instance, we will be utilising the complimentary Filezilla FTP customer to upload the Yoast SEO plugin to our WordPress website. You can see our tutorial here on how to attach via SFTP. Relying upon who you host the guidance will change. You can refer to your provider’s documentation on how to attach to your site through FTP.
The first stage is to go to the WordPress storage and manually download the plugin. You can explore the plugin and then connect to it.
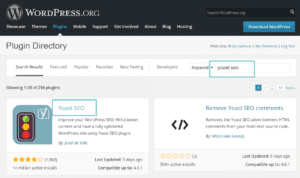
Then click on the “Download Version xx” button. This will download the most delinquent.zip performance of the plugin to your computer.
Then through your FTP consumer, upload the plugin to your /public/wp-range/plugins manual. Reminder: You will require to hold the plugin folder within the detailed plugin folder. For example, underneath the WordPress-SEO.3.5 folders, there is another folder named WordPress SEO. That is the folder you like to move around.
Then to start the plugin, go to “Installed Plugins” under the plugin quote in your WordPress dashboard and click on “Activate” underneath the plugin you simply uploaded through FTP.
3. How to Install WordPress Plugins through WP-CLI
The third and last way to upload a plugin to WordPress is through WP-CLI, which is a management bar tool for operating WordPress. You can check out our additional in-depth guide on utilising WP-CLI to obtain it installed. Once you found WP-CLI you can run the subsequent commands to install a plugin. First, though, you will need to understand the name. The name of the plugin you utilise for WP-CLI is just the folder title on the storage or Git. So in this example, it is “WordPress-SEO.”

And that is it! As you can visit WP-CLI is rather fast and once you obtain used to it, can be a significant way to control your WordPress structures, plugins, and installs. Make sure to also inspect the authorised WP-CLI documentation for further orders and standards.
Save time, and costs and maximize site implementation with:
- Instant help from WordPress hosting specialists, 24/7.
- Cloudflare Enterprise integration.
- The global audience comes with 34 databases worldwide.
- Optimization with our built-in Application Implementation Monitoring.
We hope that the above article helped you to install plugin in WordPress. You can also take help from our WordPress technical Support Number. Please Dial +1-888-738-0846 (Toll-Free). We have a team of good professional who can resolve all your issues related to WordPress.
